1. Open the photo you would like to enhance.
 2. Zoom in pretty close so you have a nice close up of the eyes. On Paint Shop Pro you can click "view" on the top links and go down to "zoom in more".
3. As pictured below you want to click on the "selection" tool, then go to "freehand selection".
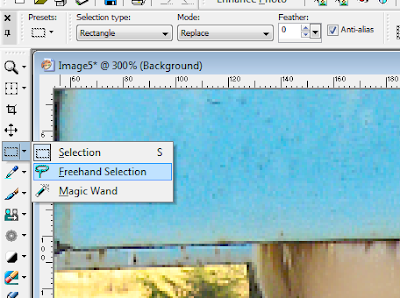 4. On the tool bar at the top of the editing program (or another area.. if you do not have PSP), you need to change the 0 that should be there to a 3.
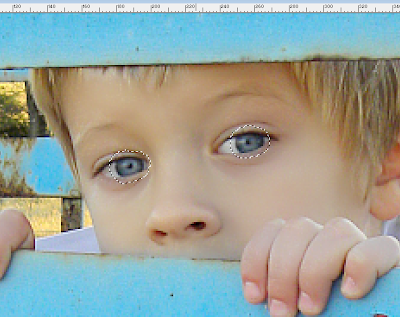
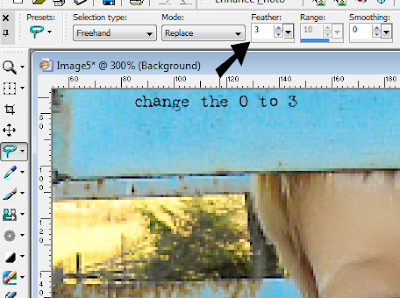 5. You will need to use the "freehand selection" tool to select the eye. Although below it looks like I went completely around the eye, I did not... this is where the 3 you entered above comes into play. You want to use the "freehand selection" tool to outline the center of the eye color (where the color of the eye meets the white, outline that line as close as you can).
 6. It's easier to do both eyes at the same time. After you have one eye selected you need to do the second. While selecting the second eye you will need to hold down the "shift" key at the same time. If you do not hold the shift key while outlining the second eye, you will notice the first eye you already selected will no longer be selected. So be sure to hold that shift key down. Once you have both eyes selected it should look similar to the below photo.
 7. After both eyes are selected click on the "adjust" link on the top bar, go down to "hue and saturation", then click on "colorize".
8. The below box will pop up and we will now work with some color. The hue bar will change the colors, and the saturation bar will change the strength of the color. You usually want the saturation lower because you want to keep the eye color realistic. You will really just play around with these two settings. I can't give an exact number because it depends on the photo you are working with. In the below, I am changing his eyes to a green shade and used those numbers pictured.
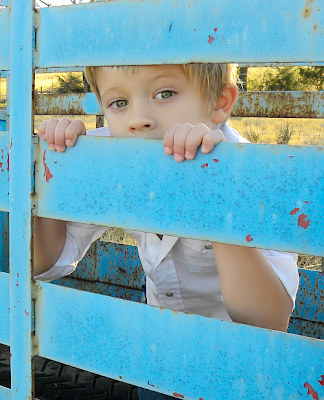
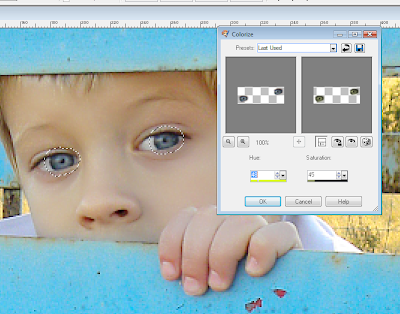 9. Once you have your colors set, click okay. Then you will see the below. His eyes are now green. If you don't like the color, just "undo" it and start back at step 7 above and play around with more colors.
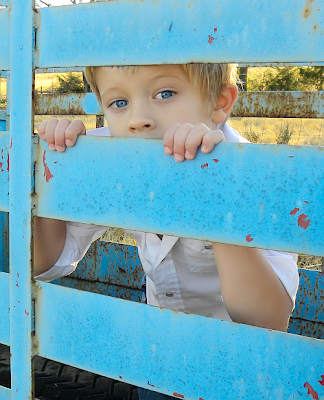
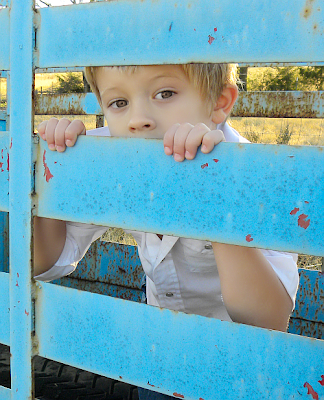
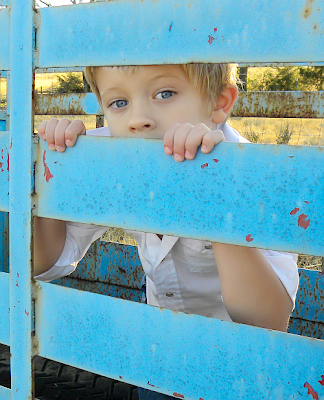
 Below are the finished eye color enhancements I did with this picture by the above steps.
He already has really really blue eyes, so I could just barely enhance those without making them look fake. A major tip is to just remember to keep them realistic. Realistic colors, and realistic brightness. This tutorial can be used for your photography photos, family photos, anything at all. Next tutorial I will be posting will let you know how to make eyes pop. It is very similar to this.
